Monday, October 31, 2011

Mom's Oatmeal Cookies

     I love fall. The leaves are changing, the temperatures are dropping, soup is in the pot in my kitchen, and I feel like baking! Well, truth be told, I almost always feel like baking.  But at least when the temperatures are dropping, I don't feel guilty about heating up my house...


This weekend, I had a couple of gatherings to go to... pre-Halloween type things.  I had great plans for a costume for the one on Saturday, but couldn't get my act together in time to actually make it.  I did get my act together to make cookies and spicy cheese spread, though! I'll let you know about the cheese spread in my next post.  This one is about the cookies.

In general, I have to say that I'm not a huge fan of oatmeal cookies.  Don't know why.  Maybe because they are frequently too hard or too nutmeg-y or too cement-y or the raisins are dried and gross.  So usually, I'm not even going to bother with making them.  But recently I had a hankering for my Mom's oatmeal cookies.  Now these cookies are what all oatmeal cookies should strive to be.  These are soft and chewy, there's no nutmeg in them, and even if you use old, really dry raisins, they come out soft.  And the recipe makes A TON.  Seriously.  It came from the "large batch cooking" section of the Woman's Day Encyclopedia of Cookery that Mom has had on her shelf ever since I can remember.  The book says the recipe yields 5 dozen, but they must be making giant cookies to get that few.  I halved the recipe last weekend and got 4.5 dozen!

So here's the recipe:


                                                     Refrigerator Oatmeal Cookies

3/4 cup granulated sugar                                                4 cups sifted all-purpose flour
3 1/2 cups firmly packed light brown sugar                     2 tsp. baking soda
1 1/2 cups margarine, melted                                          2 tsp.ground cinnamon
4 eggs, beaten                                                                 1/2 tsp. salt
2 cups quick-cooking oats                                               1 cup chopped nuts
                                                                                         2 cups seedless raisins

If you're going to only chill for a few minutes, preheat your oven to 350*F now.
Mix sugars and margarine. I used butter because I like it better. Mom sometimes uses a mixture of butter and shortening. 
Creamed butter and sugar

Add eggs and oats. I like to make sure my eggs have been incorporated before I add the oats.
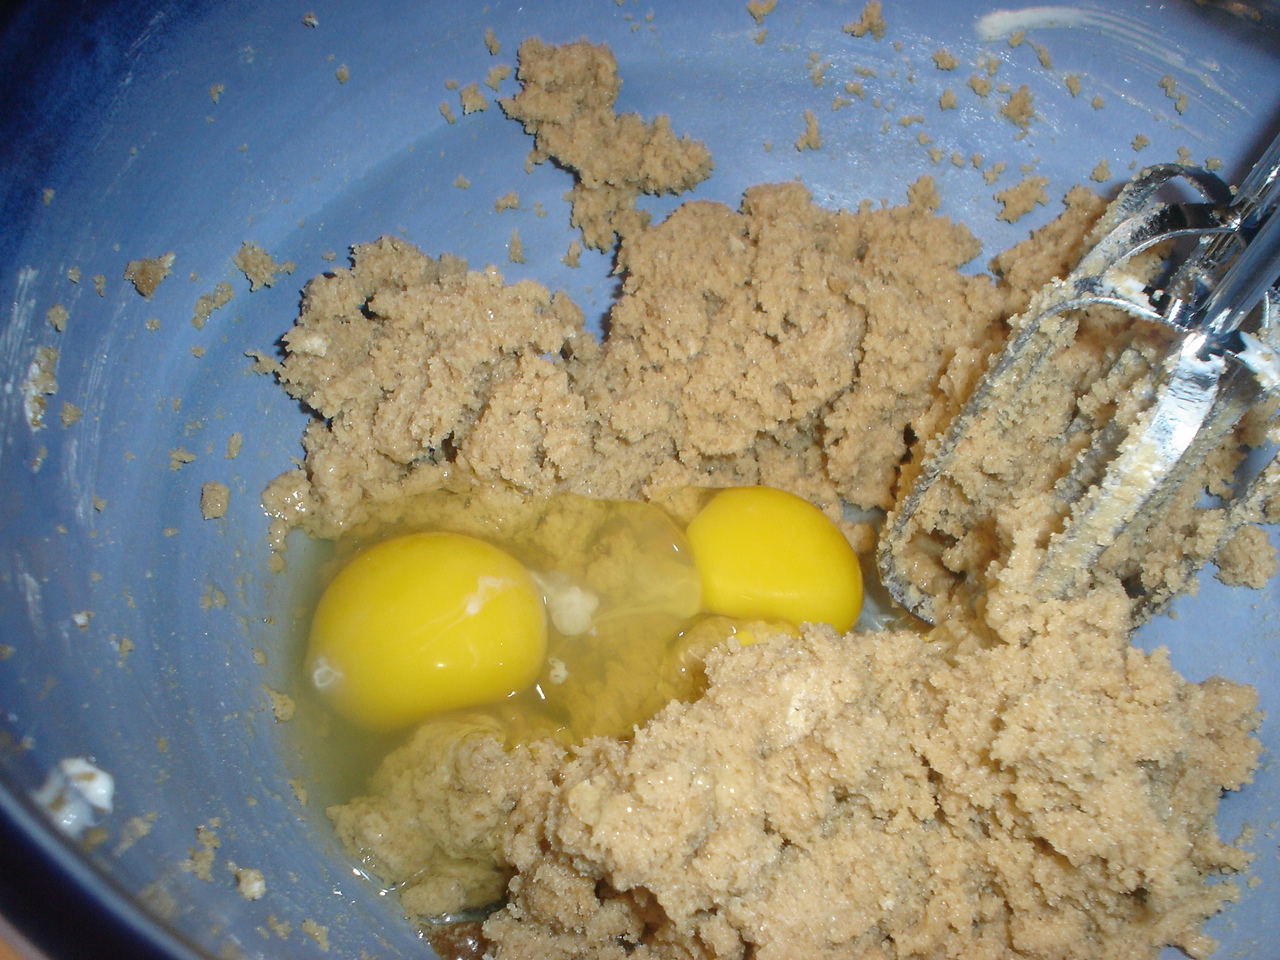
Eggs
Oats


Mix in the oats!
 Sift together the flour, baking soda, cinnamon, and salt.
Dry ingredients
Stir in flour mixture.


 Add nuts and raisins and mix well.
All in, and chill!
 Pack into 2 loaf pans (9 x 5 x 3 in.) lined with wax paper.  Chill thoroughly.   When ready to bake, turn out of pans and remove wax paper.  Slice 1/4 in, thick; put on ungreased cookie sheets. Or, leave the dough in the bowl you mixed it in. Cover, and chill for 15 minutes or so. Scoop out heaping spoonfuls of the dough and plop them on ungreased baking sheets.  

Scoop up spoonfuls
 Bake at 350 degrees for 10 min.  Makes 5-10 dozen cookies, depending on the size of the slice or spoonful.
Plop the spoonfuls on the cookie sheet. You can probably fit 12-15 on a sheet.
Now, I don't use nuts because I'm not a fan of nuts in cookies.  Its a texture thing- I want my cookies to be chewy and not hard. But I use half again the amount of raisins, which, if you're halving the recipe is 1.5 cups (half the recipe being 1 cup, half again being 1.5 cups) or if you're making the whole recipe is 3 cups of raisins.  You could probably throw some dried cranberries in as part of that amount, but I haven't tried it that way yet. 

You can also pack the dough like it says and  wrap up well and FREEZE it, which will make for easier cookie-ing at a later date.  In fact, I think I'm going to do this this weekend to freeze for the holidays.

These turn out beautifully, and are pretty easy to make. And they have healthy stuff in them, like oatmeal, raisins, and nuts (just forget about the stuff like butter or the more than 4 cups of sugar!) I hope you make these and like them as much as I do!
Yummy!

What's cooking in your kitchen?

Sunday, October 30, 2011

Pumpkin Guts!

Happy Halloween!


If you've already carved your pumpkin, I hope you didn't throw out the seeds, because they make a very delicious snack.  In fact, if you did throw out the seeds, go find another pumpkin- just a little one will work fine, and cut it up so you can do this!

You will need
seeds from 1 pumpkin (or two or three or however many you want to do)
Worcestershire sauce
garlic powder
onion powder
season salt

Gut your pumpkin.  Get out all the glop and gloop. 
                         

gloop and glop


Separate the seeds from the slimy stringy stuff.

slimy stringy stuff


Rinse the seeds off and pat them dry or let them air dry on some paper towels (or a regular kitchen towel if that's what you want!)

Rinsed pumpkin seeds (hull and all!)
Turn your oven on to 400*F.
Put the seeds back in a bowl.  Shake the bottle of Worcestershire sauce over them a few times.  If you're measuring, maybe a couple of teaspoons, but not more than a tablespoon.  Shake your onion, garlic, and season salt over similarly.  Not more than a teaspoon of any of them, but especially go easy on the season salt, since the Worcestershire is already salty. 

Mix the seeds and the sauce and seasonings with a spoon or your fingers.  Spread them out in a single layer on a greased cookie sheet.  If you want particularly easy clean up, line your sheet with foil and then spray it.

Put the pan in the oven. Stir every 5 minutes or so. Don't let the seeds burn, they will not taste as good.

We like to put these in our Chex Mix.  We also like to eat them straight off the pan. One reason I like roasted pumpkin seeds so much is because the seasoning choices are just about endless.  You could go with just salt and garlic, or spice it up with some cayenne, use some fresh herbs and olive oil... just be creative and enjoy!

What's cooking in your kitchen?
Boo!

Saturday, October 22, 2011

Channeling an earlier age

Today, I had a good friend over. We haven't had a chance to catch up over the past month. So this morning, I baked a coffee cake, and we sat down and talked for several hours.


I think we (society in general?) have lost some of the soul warmth that comes from having a friend over and cooking for them. So often we say, "Let's go have lunch", and we meet at some restaurant where a stranger serves us different meals. Its another form of self involvement and not allowing people to get close.  But to have someone into your home (whether it's Donna Reed clean or not!), into your personal space; to consider and select a meal or a morsel that will be enjoyed by and comforting to a person you love. Shared feelings, shared experience, shared laughter, shared tears, shared love, shared food.   Part of it is solace, and part of it is the cement that binds friendships together.  Even if it is just coffee cake.


Blueberry Coffee Cake:

1/4 cup butter, room temperature
3/4 cup sugar
1 egg
1/2 cup +2 Tbsp milk
1/2 tsp vanilla
2 cups flour
2 tsp baking powder
1/2 tsp salt
2 cups blueberries, fresh or frozen
4 oz  cream cheese, cut into cubes (optional)

Topping:
1/2 cup brown sugar
3 Tbsp flour
1 tsp cinnamon
3 Tbsp butter, room temperature


Turn your oven on to 375*F.
Sift the flour, baking powder and salt together. Set them aside for a few minutes.
Cream your butter and sugar together until they're light and fluffy.


Add the egg and beat it in, too.  Start beating in the flour mixture and milk, alternating until its all beaten in and is a nice sticky batter. Add in the vanilla, and fold in the blueberries, gently.  Your batter is going to turn a light bluish purple from the berries. Fold the cream cheese into the batter too. Spread the batter into a greased 9 inch square or circular pan.


Mix the toppings dry ingredients together, then cut in the butter until it looks sandy.  Sprinkle it over the top of the batter.  It might clump.  If it does, that's okay!


Put it in the oven.  Let it bake for 45-60 minutes, until it starts to smell good and a toothpick stuck in the middle comes out clean. Put some coffee on while its baking.  You're kitchen is going to smell wonderful!
Let it cool for a few minutes- hot gooey blueberries are sort of like hot lava if you eat them straight from the oven!

Enjoy with friends.

Make something yummy for someone you love today!

What's cooking in your kitchen?

Friday, October 21, 2011

Tuesday Chili and Wednesday Chowder

I meant to post Tuesday and Wednesday separately, but I got a tad behind this week, so you're in for a bargain if you're reading...
Its two! Two! Two recipes in one (blog)!

 
 Tuesday and Wednesday were grey and windy here, chilly. 
When the weather cools off like this, I crave soup.  Warm, full of veggies, hearty, and filling. Plus, they make the house smell wonderful while they cook slowly.  I usually like to serve soups with corn bread.  Pretty sure it's because that's how Mom did it while I was growing up.  But since I had the artisan bread dough left, I simply pulled out a hunk each day and baked it instead.

Both of these soups are easy.  The chili I dump in the crockpot to let simmer all day, and the chowder comes together in a pot on the stove with little effort. So without further ado:

Chili:
That's a purple bell pepper up front- not an eggplant!
1 can of chili beans
2 cans of black, kidney, or pinto beans
1 can of tomatoes with chiles (like Rotel)
2 cans of tomatoes (I used one can and one fresh tomato with a can of tomato sauce)
3/4 lb ground beef
1 lg onion
1 green or red pepper
garlic
salt and pepper
chili powder
cumin
cayenne pepper
oregano
1/2 of 1 small can of chipotle peppers in adobo sauce (optional- will make HOT)

Put your beef in a skillet with the chopped onion and chopped pepper.
I used a purple bell pepper and a serano, for a little different flavor. They were on hand, and needed to be used.
Inside of a purple bell pepper.  Who knew?!
Add some minced garlic- one or two cloves is fine, or if you have the jar of pre-minced garlic like I do, just scoop out a spoonful.  I have a homemade taco/fajita seasoning that I add at this point- just a teaspoon or two.  If you don't have anything like this, use a little chili powder and a little cumin. 
Homemade taco seasoning!


While the beef/onion/pepper combo is getting nice and brown,
All in the pot to cook!
open your cans and pour them out into the crockpot.  Mine is a 6 quart.  I think a 5 quart will work as well, but I'm not sure about a 4 quart.  If you're going to add the chipotles in adobo, now is the time.  Let me tell you, if you do this, the adobo sauce really kicks the flavor up a notch or three, but you will amp up the spice factor at the same time. A Lot. Don't just empty the can, you'll need to chop up the chipotles inside. Seeds add even more heat, so keep them at your own risk!
Add about a tablespoon of chili, 2 teaspoons of cumin, 1 teaspoon of oregano, and start with 1/4 teaspoon of cayenne.   You can adjust this seasoning mix to your own personal taste.


Drain the beef- or don't if you like.  Dump it into your crockpot.  Give it a stir.  Turn your crockpot on low for 6-8 hours, or high for 4-5 hours.
You should smell this in your house!


Potato Corn Chowder:

This is one of my favorite soups from when I was a kid.  Its so creamy and smoky with bacon.  Its usually the second soup I make every fall (after chili!).  One of the great things is that you can save yourself a bunch of time by using all frozen veggies. Don't use pre-cooked bacon though. Trust me, it just doesn't work.

3 cups chopped potato
2 cans of corn (or 1 box of frozen corn- tells you how old this recipe is- do they even make boxed frozen veggies anymore?)
1 large onion, diced
1 tsp salt
1/2 tsp pepper
2 Tbsp parsley flakes
1/2 lb bacon, fried crispy and crumbled or rough chopped
1 1/2 c milk
2 Tbsp flour
1 small box of "pastureized processed cheese food product"

Okay, so let me get this out of the way first.  This has "plastic" cheese in it.  I know its not a "whole" food. Actually,  its not real food, but just a food product.  I DON'T make a habit of using it, in fact, I think this is the only recipe I buy it for. Probably, you can make a cheese sauce (toasting a little flour and butter, adding some milk, and then some shredded cheese) and use that instead.  If you do this, and it works, let me know.  You'll definitely deserve a kitchen salute.  But this is a flavor of my childhood, and so I choose to use the Velveeta when I make this, approximately twice a year.  

Put your corn (with canning liquid), potatoes, onion, salt, pepper, and parsley in a dutch oven type pot. Add enough water to cover (but not drown!).  Bring it to a boil, then simmer until the potatoes are soft.
All that steam means the taters are cookin'! It also means you can't really tell what this picture is!


While all that's cooking, crisp your bacon.  But don't burn it. Because then you'll have to use the extra package you bought for breakfast on the weekend.  And that would be very sad.

I tried to do the bacon in the oven, instead of the stove (messy) or microwave (hard to clean up). But it burned.
 Add the bacon and milk and continue to cook for a few minutes on a medium low heat. Maybe 5, maybe 10, just don't scorch your milk!   Now, in a small bowl or measuring cup, mix some of the liquid from the pot with the flour.  Use a fork and break up the lumps.   Once its smooth, add it to the pot.  This will help thicken the soup. Cook a few more minutes. While its cooking, cube up your velveeta.  Maybe 10 minutes before you want to serve it, dump the velveeta in the pot.
This is what it looks like while the velveeta is melting.
Stir it until its melted through. Fresh parsley makes a nice garnish, but its not strictly necessary...

I love this with hot fresh bread, or hot corn bread, or no bread at all. Dip yourself a bowl and keep warm!


What's cooking in your kitchen?

Tuesday, October 18, 2011

Monday Made Up: Lasagna Pizza

The funny thing about trying new things in the kitchen is that you have to decide what to do with your finished product. Eat it? Give it away? Incorporate it into something else?  After all, there's only so many jars of apple butter that you can eat (well, maybe.  I do like my apple butter!)

In my case, I have this artisan bread dough and the ricotta I made on Saturday.  I could just make several loaves of bread.  We like bread here at my house, and the loaf only makes 4 or 5 slices.  The ricotta cheese is really really fantastic by itself, or with some fruit.  But I also like ricotta in lasagna, and I've heard that the artisan bread dough makes fabulous pizza crust.  Also, you should know that I have a half jar of spaghetti sauce in my fridge right now, as well as a block of mozarella.  Almost the makings of pizza (no pepperoni) or lasagna (no noodles in the pantry).   Which is where my brain took off.  Why not combine the best of both?!

Now, one thing I didn't have on hand was Italian sausage.  I did, however, have some meatballs in my freezer, ready for use, and I thought, "Perhaps these will work!"

So here's the directions for my concoction:

rising dough


 Turn your oven on to 450* F.  Take out a lump of the artisan dough in the fridge. Follow regular directions for shaping. Let rise for 20 min or so on the pan you plan to bake on. Or follow the directions for whatever pizza dough you're using.

 
shredded cheese
In the meantime, shred up 2/3 of a block of mozarella cheese (16 oz)
Defrost your meatballs and cut them in half, or if you would prefer Italian sausage, go ahead and fry it up.

Mix about a cup of ricotta cheese with 2 eggs, or 1 egg and 1 egg white (because I had an eggwhite leftover), plus several tablespoons of dried or fresh parsley and several tablespoons of parmesan cheese. And maybe some minced garlic and oregano or basil. And a few dashes of salt.
ricotta cheese mixture
Stretch the dough out to the shape you want it, rectangular-ish, or circle-ish. I suppose you could even do triangular-ish if you so desired, but I think that might make the pieces strangely shaped.

Spread some spaghetti sauce over the dough. Or use whatever pizza sauce you like. Top the sauce with your meatballs, or cooked sausage.  Take a spoon and dollop the ricotta cheese in big piles on top of the meat.  Use the back of the spoon to spread it out over the top. Sprinkle the grated mozzarella evenly over the top of everything.  Pop it in the oven for 20 minutes or so.
sauce and meatballs
dollops of ricotta on top
shredded mozzarella over all


First Slice
Now, we liked this, and I think it captured the essence of lasagna for me.  But I also thought it was missing something- some... oomph.  Perhaps it was because of the meatballs.  They're great with spaghetti, or on subs, but not spicy enough for pizza.  Or it could have been because I was using jarred sauce rather than homemade.  But the texture and creaminess of the ricotta paired well with the flavors I expected on the pizza (and were even enjoyable with the way it actually tasted!) I think I will try it again with Italian sausage, and hope that provides the balance that the pizza part of this dish needs. 

What are you creating today?

Monday, October 17, 2011

Extra! Extra!

These beauties were on my list of things to do this weekend, and I never got around to them.  But they turned out so pretty, that I had to post the picture.  Just wish I could upload the aroma, too!

Sunday, October 16, 2011

Sunday Bread

One of my projects yesterday was starting a batch of artisan bread.  According to the recipe, you should be able to make the batch and keep it in the fridge for up to 14 days, cutting off hunks to bake as you  need them.  The longer the dough ages, the more like sourdough it becomes.   Supposedly there are several sweet and savory variations to use with the basic dough recipe.  

Now, ever since I lost my job, I have been baking a lot of bread. White bread, wheat bread, challah, cinnamon swirl, banana, zucchini, pumpkin.  I'd never really thought about making "artisan" bread, thinking it was basically white bread baked in a circle on a sheet instead of in a loaf pan.  And truly, the ingredients are pretty similar, but the execution of the recipes differ drastically.    Usually, making bread takes up several hours in the morning or early afternoon.  There's the mixing and kneading, rising, punching down, rising again and finally baking.  Usually, there's quite a bit of fat is included in the recipe, as well as sugar, or milk.  This recipe is easy. It calls for 4 ingredients- water, yeast, flour and salt.  There is no kneading, and once it has risen for a couple hours, you can stick it in the fridge until the day you want to bake it.

Here's the recipe (modified from here and possibly here.)

3 cups of lukewarm water (or warm whey from making ricotta cheese, which is what I used!)
2 packets of yeast, or 1.5 Tbsp
6.5 cups flour
1.5 Tbsp kosher or coarse salt

In a small bowl, mix the water and yeast.  The yeast won't all dissolve immediately, don't worry about it.  Let this mixture stand for a few minutes while you prepare the flour and salt.  Stir the flour and salt together in a large bowl with a lid. A 5 quart food storage bucket would be great if you have one.  Make a well in the flour.

Pour the yeast and water mixture into the well. Mix together gently until all the dry ingredients have been absorbed into the dough mass.  If you're having trouble getting the last bit of flour worked in, wet your hands and use them to mix the dough. Don't Knead!

Floured on top with chunk removed. This is the largest bowl I have!
Cover the large bowl, but not sealed or airtight. Let it rise for 2-5 hours or until the dough collapses on itself.  Put the bowl in the fridge.   You can use the dough immediately, but it is easier to handle if it has chilled for a while.

To bake: Take the dough out of the fridge and sprinkle lightly wit flour. Cut off a softball sized chunk, using a serrated knife.  Keeping the floured surface on top, pull the sides down to the bottom of the ball and smooth the lump of dough.  Put it on a cookie sheet or pizza stone to rise for 40 minutes.  

Twenty minutes into the rise time, set your oven for 450*F, and place a baking or broiling pan in the oven under the rack you plan to bake on.   At the end of the 40 minute rise time, lightly flour your lump of dough. Using the same serrated knife, make three or four slashes through the top, no more than 1/4 inch deep. 
Dusted and slashed

Finished product
Pour an 8 oz cup of hot tap water into the baking dish you placed in the oven, then put the cookie sheet in the oven.  Keep the oven door closed to trap the steam- this will give you a really crunchy crust.    Bake for 30 minutes or until the crust is golden.

Now here's the hard part: Try not to cut into the loaf for about 15 minutes, the crumb texture will drastically improve, and it will be easier to cut.  But if you do like I did- cut into my first loaf immediately- real butter and a good quality jam is excellent on it!
Fresh out of the oven!

Speaking of jam... I'll be using up the rest of my apples this week for apple butter, and perhaps I'll post the recipe and pics for my pear lemon jam too!


What's cooking in your kitchen?